1 VUE整合Leaflet
1.1 安装leaflet模块
npm install vue2-leaflet -S
npm install leaflet -S
1.2 加载地图
简单的加载腾讯地图,包括一个点、一个标签、一个面和触发事件
新建一个**/src/js/txTileLayer.js**文件,放瓦片函数
1
2
3
4
5
6
7
8
9
10
11
12
13
14
15
16
17
18
19
20
21
export const TXTileLayer = L.TileLayer.extend({
getTileUrl: function(tilePoint) {
let urlArgs = null;
let getUrlArgs = this.options.getUrlArgs;
if (getUrlArgs) {
urlArgs = getUrlArgs(tilePoint);
} else {
urlArgs = {
z: tilePoint.z,
x: tilePoint.x,
y: tilePoint.y
};
}
return L.Util.template(
this._url,
L.extend(urlArgs, this.options, {
s: this._getSubdomain(tilePoint)
})
);
}
});在src/icon中放一个dian.png,这个是点的图标
src/components/HelperDocument.vue中
1
2
3
4
5
6
7
8
9
10
11
12
13
14
15
16
17
18
19
20
21
22
23
24
25
26
27
28
29
30
31
32
33
34
35
36
37
38
39
40
41
42
43
44
45
46
47
48
49
50
51
52
53
54
55
56
57
58
59
60
61
62
63
64
65
66
67
68
69
70
71
72
73
74
75
76
77
78
79
80
81
82
83
84
85
86
87
88
89
90
91
92
93
94
95
96
97
98
99
100
101
102
103
104
105
106
107
108
109
110
111
112
113
114
115
116
117
<template>
<div id="map"></div>
</template>
<script>
import "leaflet/dist/leaflet.css";
import "leaflet/dist/leaflet.js";
import { TXTileLayer } from "../js/txTileLayer.js";
export default {
data() {
return {
map: null
};
},
methods: {
initLeaflet() {
this.map = L.map("map", {
center: [39.916527, 116.397128],
zoom: 10,
maxZoom: 23,
minZoom: 3
});
//按照新定义瓦片规则加载底图
let url =
"http://rt1.map.gtimg.com/realtimerender/?z={z}&x={x}&y={y}&type=vector&style=1&v=1.1.1";
let getUrlArgs = function(tilePoint) {
return {
z: tilePoint.z,
x: tilePoint.x,
y: Math.pow(2, tilePoint.z) - 1 - tilePoint.y
};
};
let options = {
subdomain: "012",
getUrlArgs: getUrlArgs
};
const txMap = new TXTileLayer(url, options);
txMap.addTo(this.map);
//marker
var myDivIcon = L.divIcon({
className: "my-div-icon",
html: "这是一个测试用的marker",
iconSize: 150
});
var marker = L.marker([39.916527, 116.397128], { icon: myDivIcon }).addTo(
this.map
);
marker.on("click", function(e) {
console.log(e);
alert("我是Marker。");
});
//point
var myIcon = L.icon({
iconUrl: require("../icon/dian.png"), //icon图片
iconSize: [30, 30], //icon的尺寸
iconAnchor: [15, 15], //锚点在icon上的坐标,左下角为原点
popupAnchor: [40, 0], //弹出框的锚点
shadowUrl: require("leaflet/dist/images/marker-shadow.png"), //阴影图片
shadowSize: [30, 30], //阴影尺寸
shadowAnchor: [15, 15] //阴影锚点
});
var point = L.marker([39.916527, 116.397128], {
icon: myIcon,
title: "这是一个测试用的point"
}).addTo(this.map);
point.on("click", function(e) {
console.log(e);
alert("我是point。");
});
//polygon
var polygon = L.polygon(
[
[
[40.0, 116.4],
[40.1, 116.4],
[40.1, 116.5],
[40.0, 116.5]
], // 外部
[
[40.05, 116.45],
[40.06, 116.45],
[40.06, 116.46],
[40.05, 116.46]
] // 孔洞
],
{
color: "green",
fillColor: "#f03",
fillOpacity: 0.5
}
).addTo(this.map);
// 绑定一个提示标签
polygon.bindTooltip("这是个多边形");
// 飞到这个多边形的位置
// this.map.fitBounds(polygon.getBounds());
polygon.on("click", function(e) {
// console.log(e);
alert("我是polygon");
});
}
},
mounted() {
this.initLeaflet();
}
};
</script>
<style>
#map {
width: 100%;
height: 100%;
}
.my-div-icon {
font-size: 15px;
width: 5px;
color: red;
}
</style>HistoryMap.vue
给左侧栏加一个绝对的top坐标
1
<div style="background-color: #fff; height: 100vh;width: 15%;position:absolute;left:0px;top: 60px">
build/webpack.base.conf.js
修改图标打包的limit值,把它改大一点,由原来的10000,改成80000
1
2
3
4
5
6
7
8
{
test: /\.(woff2?|eot|ttf|otf)(\?.*)?$/,
loader: 'url-loader',
options: {
limit: 80000,
name: utils.assetsPath('fonts/[name].[hash:7].[ext]')
}
}
2 VUE打包合并到后端
2.1 vue配置抽出
因为打包之后,文件都会混在一起,就很难修改了,所以要先把可能会修改的配置提取出来,再进行打包,把请求后端的url提取出来:
config.js
static中新建config.js文件
1
2
3window.g={
BASE_URL: 'http://localhost:8081/history/geometry?'
}index.html
修改mapweb-vue/index.html文件,引入config.js
1
2
3
4
5
6
7
8
9
10
11
12
13
<html>
<head>
<meta charset="utf-8" />
<meta name="viewport" content="width=device-width,initial-scale=1.0" />
<script type="text/javascript" src="/static/config.js"></script>
<title>vue-gismap</title>
</head>
<body>
<div id="app"></div>
<!-- built files will be auto injected -->
</body>
</html>HistoryMap.vue
1
var urlbase = window.g.BASE_URL;
2.2 打包
修改config/index.js
1
将bulid下的assetsPublicPath: '/',改为assetsPublicPath: './',
终端运行
1
cnpm run build
运行成功之后,会在多出一个dist文件夹,这个是打包生成的文件,需要把它放在后端程序之中!
2.3 并入Springboot
打开IDEA中的后端项目,在src\main\resources下新建一个文件夹static,把dist文件夹中的内容拷贝到static中
2.4 运行测试
在idea中运行程序之后,访问http://localhost:8081,成功!
3 工程打包本地部署
3.1 IDEA中工程打包
首先在maven的Lifecycle中,先clean一下,再package一下,稍等一会儿,在Project中的target目录下,就会出现打包好的jar包——mapweb-0.0.1-SNAPSHOT.jar

3.2 运行测试
打开cmd
切换到jar包所在目录
1
2
e:
cd E:\develop_gis\map website\project\mapweb\mapweb\target运行jar包
1
java -jar mapweb-0.0.1-SNAPSHOT.jar
运行成功,完成本地部署
报错
Failed to determine a suitable driver class1
2
3
4
5
6
7
8
9
10
11
12
13Description:
Failed to configure a DataSource: 'url' attribute is not specified and no embedded datasource could be configured.
Reason: Failed to determine a suitable driver class
Action:
Consider the following:
If you want an embedded database (H2, HSQL or Derby), please put it on the classpath.
If you have database settings to be loaded from a particular profile you may need to activate it (no profiles are currently active).
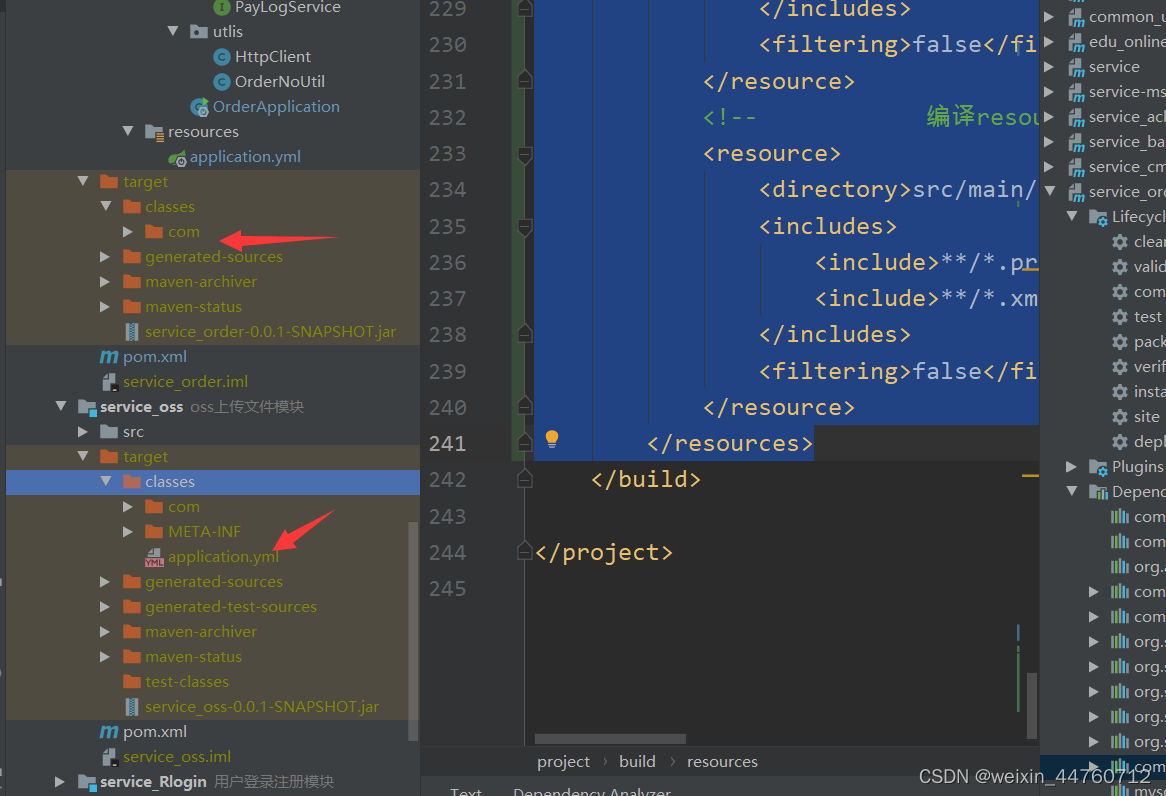
这个问题归根结底是程序的yml配置文件和没有打包进入target文件夹下,即在pom.xml文件下没有配置yml路径!!!

当yml和mapper文件都在target目录下之后,程序能够部署了,但是没有界面展示,此时的静态资源文件static还没有打包进入target下,所以在pom.xml中应该有如下的配置:
1
2
3
4
5
6
7
8
9
10
11
12
13
14
15
16
17
18
19<resources>
<!--编译main下面的xml文件和.properties文件-->
<resource>
<directory>src/main/java</directory>
<includes>
<include>**/*.xml</include>
</includes>
<filtering>true</filtering>
</resource>
<!--编译resources下面的配置文件和xml文件-->
<resource>
<directory>src/main/resources</directory>
<includes>
<include>**/*.yml</include> <!--配置application.yml-->
<include>**/*.xml</include> <!--配置mapper下的xml-->
<include>**/*.*</include> <!--配置static静态资源-->
</includes>
</resource>
</resources>
参考链接:springcloud解决运行出现Failed to determine a suitable driver class-pudn.com
